Step 1: What you will need
The following files should be saved to the server directory where all certificate/key files are stored. You can use the Certificate Decoder online tool to verify the details of the certificate.
Server Certificate: This is the certificate you received from the Certificating Authority (CA) for your domain name. You can obtain this by downloading or emailing it from the Control Panel.
Intermediate Certificates: These files allow the devices connecting to your server to identify the issues Certificating Authority (CA). These files are also known as CA bundle.
Private Key: The private key is used to generate the CSR and is required by the web server to encrypt data in transit.
Step 2: Locate Apache configuration to edit
The main configuration file which is typically called httpd.conf or apache2.conf and located in /etc/httpd/conf/ or /etc/apache2/conf/.
Note: The SSL configuration file can be in a <VirtualHost> block in another config file such as /etc/httpd/conf.d/ssl.conf. You can always search for the SSL configuration file on Linux distributions using grep command as shown below:
grep -i -r "SSLCertificateFile" /etc/httpd/
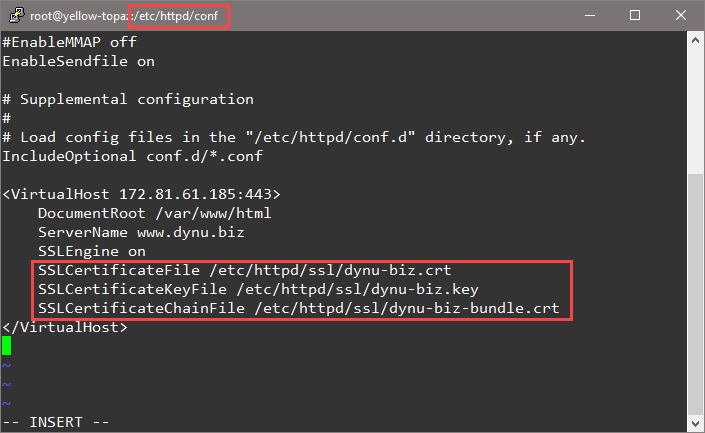
Step 3: Modify the configuration
Create a backup of the original configuration file before making any modifications. Modify the configuration to enable SSL using the SSL files.

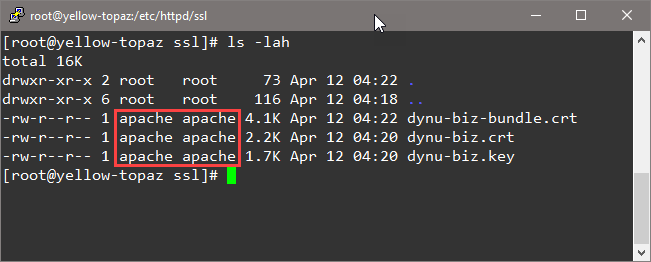
Step 4: Verify access to SSL files
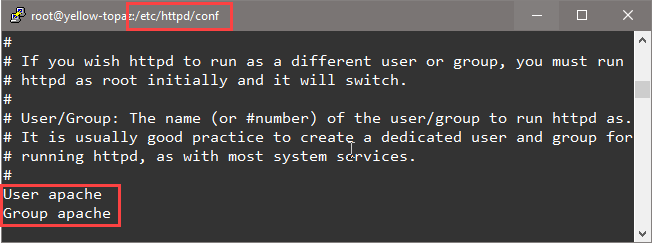
Make sure that the user/group under which Apache is running has access to the SSL file.


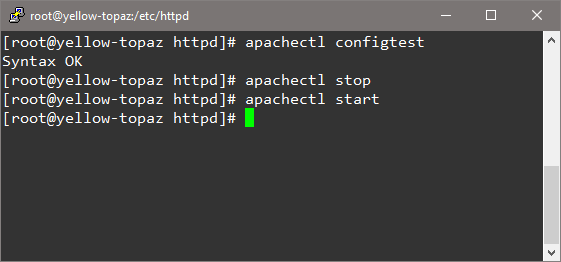
Step 5: Test configuration and restart
Test the modified configuration and restart Apache to starting using SSL/TLS.

You can use the SSL Checker online tool to check your server's SSL/TLS configuration more thoroughly.
